Showing posts with label MVVM. Show all posts

Tuesday, January 29, 2013

Windows Store Apps with F# (part 4) : Collections

In the previous post we were introduced to data binding and MVVM. We dealt with one object. How can we deal with more than one object, a collection of objects?
This time we want to show a sequence of primes:
  1. 2
  2. 3
  3. 5
  4. 7
  5. 11
The first number is the sequence number, the second is the value of the prime. We want to show this sequence in a Windows Store App. We create again a new blank Windows Store App and add a F# Portable Library. We rename the F# file to Lib.fs. Let’s follow MVVM. We start with the Model. Add the IsPrime function to Lib.fs:
module MathLib
let IsPrime n =
     if n < 2L then
            false
        else
            seq{2L..n - 1L}
            |> Seq.exists(fun x -> n % x = 0L)
            |> not

Next we create an object to represent an element in the sequence:
type Element(sequenceNumber:int, value:int64) =
    member x.SequenceNumber = sequenceNumber
    member x.Value          = value
Now it is possible to create a function that will determine the next element in the sequence of primes:  let rec nextPrime (element:Element) =
   
if IsPrime (element.Value + 1L) then
           
Element(element.SequenceNumber + 1,  element.Value + 1L)
       
else
           
Element(element.SequenceNumber,  element.Value + 1L) |> nextPrime

Next we create a sequence of all primes (details at page 320 of Real-World Functional Programming by Tomas Petricek and with Jon Skeet, buy this book!!):
let rec primeSequence =
    seq { yield Element(1,  2L)
          for e in primeSequence do yield e |> nextPrime }

and test the model by adding a test to the Script.fsx file.
#load "Lib.fs"
MathLib.primeSequence |> Seq.take 5 |> Seq.iter( fun r -> (printfn "%d. %d" r.SequenceNumber r.Value))

When we run the code in F# Interactive we get the expected result:
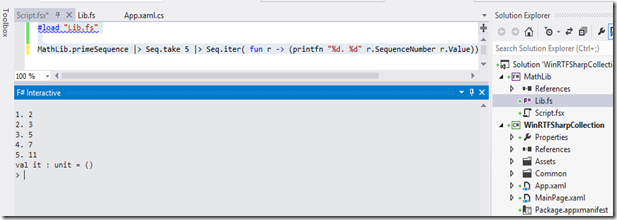
PrimeSequence

Compile the project and add a reference from the C# project to the F# project.

Next step: the Model. We contact the UI designer and he sends us the following XAML:
<GridView ItemsSource="{Binding}" >
    <GridView.ItemTemplate>
        <DataTemplate>
            <Grid>
                <Grid.ColumnDefinitions>
                    <ColumnDefinition />
                    <ColumnDefinition />
                    <ColumnDefinition />
                </Grid.ColumnDefinitions>

                <TextBlock Grid.Column="0"  Text="{Binding SequenceNumber}"/>
                <TextBlock Grid.Column="1"  Text="->"/>
                <TextBlock Grid.Column="2" Text="{Binding Value}"/>
            </Grid>
        </DataTemplate>
    </GridView.ItemTemplate>
</GridView> 


We past it in the Grid of the MainPage. Gridview is one of the Windows Store App controls that can display collections.

Next we update the MainPage code behind:
using System.Collections.ObjectModel;

and
 public sealed partial class MainPage : Page
    {
        private ObservableCollection<MathLib.Element> Collection;
        
        public MainPage()
        {
            this.InitializeComponent();

            Collection = new ObservableCollection<MathLib.Element>()
                {
                    new MathLib.Element(1, 2),
                    new MathLib.Element(2, 3),
                    new MathLib.Element(3, 5),
                    new MathLib.Element(4, 7),
                    new MathLib.Element(5, 11)
                };

            this.DataContext = Collection;
        }

We have created an ObservableCollection class called Collection and added some elements so we can see the result of the binding.

F5:

PrimeSequenceWinRT1

It works as expected but it does not look good.

So we contact our designer again. This is the code he sends us:
<Grid Background="{StaticResource ApplicationPageBackgroundThemeBrush}">
    <TextBlock Text="Primes" HorizontalAlignment="Left" VerticalAlignment="Top" FontSize="42" Margin="80,40,0,0" />
    <GridView x:Name="ItemListView" ItemsSource="{Binding}" Margin="80, 100, 80, 80">
        <GridView.ItemsPanel>
            <ItemsPanelTemplate>
                <WrapGrid />
            </ItemsPanelTemplate>
        </GridView.ItemsPanel>
        <GridView.ItemTemplate>
            <DataTemplate>
                <Grid Width="200" Height="60" Background="Green">
                    <Grid.ColumnDefinitions>
                        <ColumnDefinition Width="60"/>
                        <ColumnDefinition Width="20"/>
                        <ColumnDefinition Width="120"/>
                    </Grid.ColumnDefinitions>

                    <TextBlock Grid.Column="0"  Text="{Binding SequenceNumber}"  HorizontalAlignment="Left"
                        VerticalAlignment="Top"
                        FontSize="15"
                        Foreground="Black"
                        Margin="5,5,5,5" />
                    <TextBlock Grid.Column="2" Text="{Binding Value}"  HorizontalAlignment="Left"
                        VerticalAlignment="Top"
                        FontSize="24"
                        Foreground="White"
                        Margin="5,5,5,5"/>
                </Grid>
            </DataTemplate>
        </GridView.ItemTemplate>
    </GridView>
</Grid>

and the result looks like this (replace the XAML and press F5):

PrimeSequenceWinRT2

We accept this design.

Remark: there are better ways to deal with design data in XAML: [WPF / MVVM] How to get data in “design time” ?

Now it is time to glue the Model and the View together, we will add the View Model code.

First we change the initialization of the Collection:
  Collection = new ObservableCollection<MathLib.Element>();

and add a new F# file to the F# project called ViewModel.

We add the following code:
module ViewModel
open System.Collections.ObjectModel
let addElements(collection:ObservableCollection<MathLib.Element>) =
    collection.Clear()
    MathLib.primeSequence |> Seq.iter collection.Add


Build the solution and add the following code to event handler OnNavigatedTo of the MainPage:
protected override void OnNavigatedTo(NavigationEventArgs e)
{
    ViewModel.addElements(this.Collection);
}

F5 and the application never shows the Main Page:

screenshot_01292013_114516

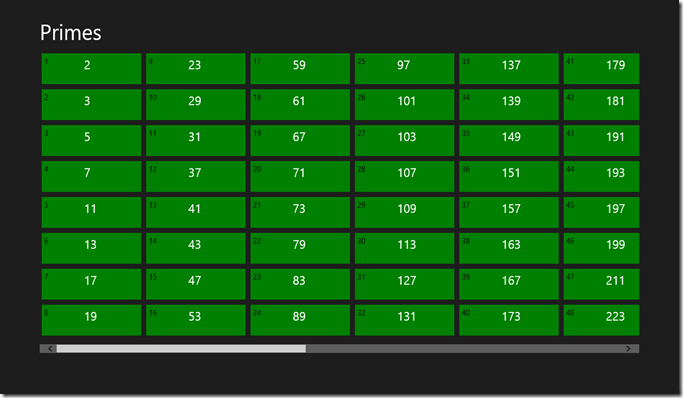
When we reduce the number of elements to 100
let addElements(collection:ObservableCollection<MathLib.Element>) =
    collection.Clear()
    MathLib.primeSequence|> Seq.take 100 |> Seq.iter collection.Add


we get the expected result.
screenshot_01292013_114929

This solution will not work when we want to display a very large number of primes.

So we go the async/await way again.
protected async override void OnNavigatedTo(NavigationEventArgs e)
{
    await ViewModel.addElementsTask(this.Collection);
}

and change the ViewModel
module ViewModel
open System.Collections.ObjectModelopen System.Threading.Tasks
let addElements(collection:ObservableCollection<MathLib.Element>) =
    MathLib.primeSequence|> Seq.iter collection.Add

let addElementsTask(collection:ObservableCollection<MathLib.Element>) =
     collection.Clear()

Task.Factory.StartNew(fun _ -> addElements collection);

This time we get error messages:

Error

The C# project needs a reference to the F# library. We will not go that way, we solve the issue by creating a Task of int and add a dummy return value.
module ViewModel
open System.Collections.ObjectModelopen System.Threading.Tasks
let addElements(collection:ObservableCollection<MathLib.Element>) = 
    MathLib.primeSequence |> Seq.iter collection.Add

let addElementsTask(collection:ObservableCollection<MathLib.Element>) =
     collection.Clear()
     Task<int>.Factory.StartNew(fun _ ->
                                addElements(collection)
                                0)


F5 again. This time we get an context exception.
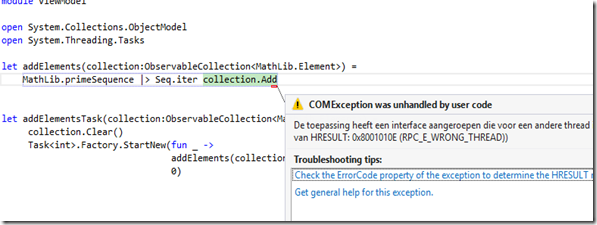
ContextException

So we add the context to the functions.
 protected async override void OnNavigatedTo(NavigationEventArgs e)
        {
            await ViewModel.addElementsTask(this.Collection, System.Threading.SynchronizationContext.Current);
        }

and

module ViewModel
open System.Collections.ObjectModelopen System.Threadingopen System.Threading.Tasks
let addElements(collection:ObservableCollection<MathLib.Element>, context:SynchronizationContext) =
     MathLib.primeSequence |> Seq.iter(
fun x -> context.Post((fun _ -> collection.Add(x)) ,null))
let addElementsTask(collection:ObservableCollection<MathLib.Element>, context:SynchronizationContext) =
     collection.Clear()
     Task<int>.Factory.StartNew(
fun _ ->
                               
addElements(collection,context)
                                0)


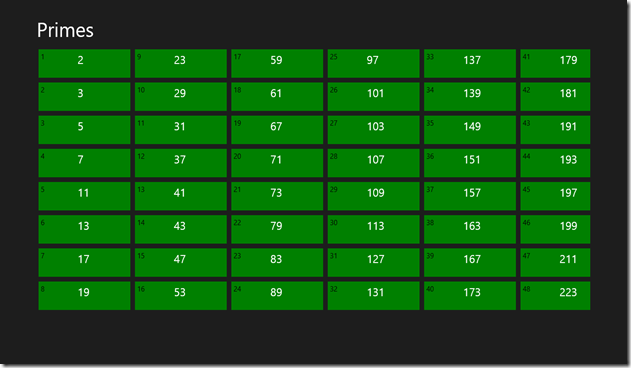
and we get the desired result:
screenshot_01292013_124616

We end with two small remarks:


  1. In this post we used the ObservableCollection, this is a .NET solution. The WinRT way is to use IObservableVector<T>.

  2. We can replace addElementsTask by
let addElementsTaskMutable (collection:ObservableCollection<MathLib.Element>, synchronizationContext:SynchronizationContext) =
    collection.Clear()
    Task<int>.Factory.StartNew(
        fun _ -> 
        let mutable e = MathLib.Element(0,  1L)
        while true do
            e <- MathLib.nextPrime e
            let x = e  //make the result immutable
            synchronizationContext.Post((fun _ -> collection.Add(x)) ,null)
        0       
        )
This seems to improve the performance of the application quit a lot.


Monday, January 28, 2013

Windows Store Apps with F# (part 3) : Data Binding and MVVM

In this series of posts we investigate the interoperability between WinRT and F#. In the previous post we solved some issues by adding input checking and async event handling. Our code still contained C# code. We can ride of some of the C# code by data binding.
Data binding connects XAML code directly with .NET objects. Let’s create a simple example.
Open the project we have created in part 1 and updated in part 2 and add a F# file called Process. We add the namespace MathLib and create an object Process.
namespace MathLib
type Process() =
let mutable _output = "output"

member x.Output
with get() = _output
and set(v) =
_output <- v

and rebuild the project so the Process object becomes available in the C# project.

To the C# code of the MainPage we add a process variable, create a new Process object. We add it to the DataContext of the MainPage:
Process process;
public MainPage()
{
this.InitializeComponent();
process =
new Process();
this.DataContext = process;
}

and change the MainPage.xaml: Text="{Binding Output}"
<TextBlock Grid.Row="3" Grid.Column="1" Grid.ColumnSpan="3"  
x:Name="result"
Style="{StaticResource FSharp}"
Text="{Binding Output}"
/>

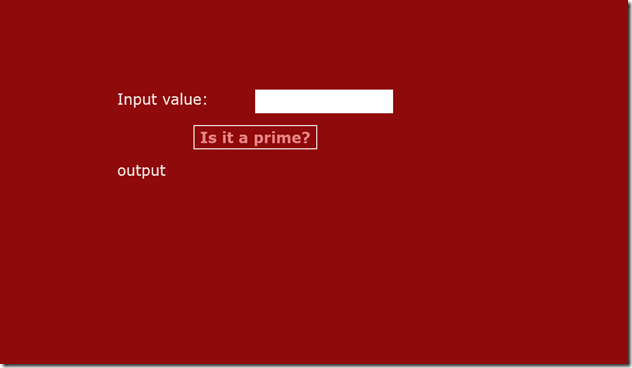
F5 and this is the result.

screenshot_01262013_142046

The initial value of the Process object (“output”) is shown at the location of the result TextBlock.

Next we at an extra property to Process object.
namespace MathLib
type Process() =
let mutable _input = "input"
let mutable _output = "output"

member x.Input
with get() = _input
and set(v) =
_input <- v

member x.Output
with get() = _output
and set(v) =
_output <- v

And add a Execute method.
     member x.Execute() = 
x.Output <- _input |> MathLib.Wrapper.IsPrimeText

And change the XAML of the TextBox
<TextBox Grid.Row="1" Grid.Column="3"                  
x:Name="inputValue"
FontFamily="Verdana"
FontSize="32"
Text="{Binding Path=Input, Mode=TwoWay}"
/>

We change the code of the event handler:
private void OnClick(object sender, RoutedEventArgs e)
{
process.Execute();
result.Text = process.Output;
}

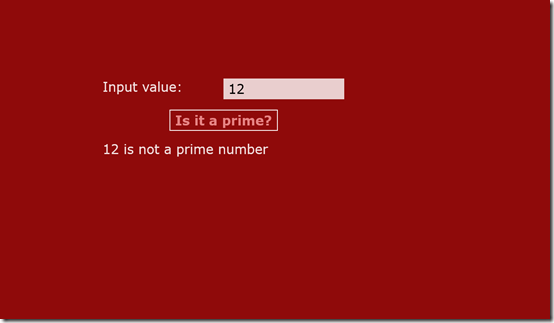
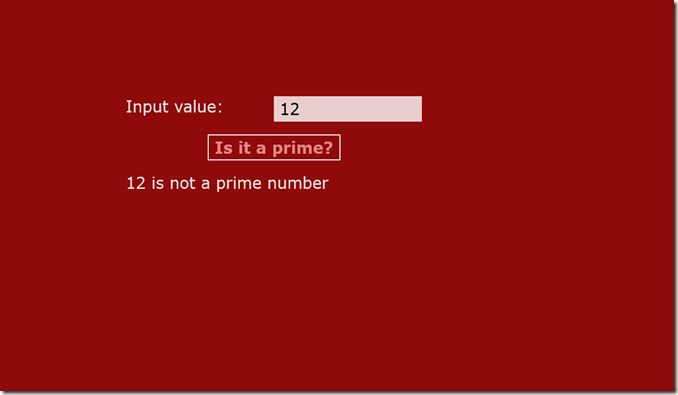
and test the result by entering “12” as input and click the button.

screenshot_01262013_151226

So by adding “Mode=TwoWay” the input value of the TextBox is transferred back to the Input property of the Process object.

Let’s change the event handler, let’s remove the last line:
private void OnClick(object sender, RoutedEventArgs e)
{
process.Execute();
}

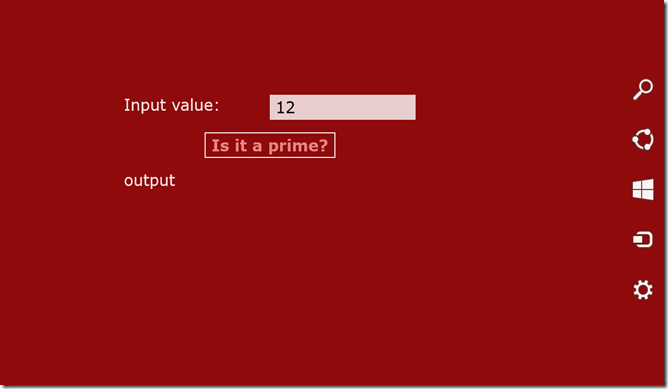
and test again.

screenshot_01262013_151435

This time the result is not updated. We have to notify the XAML that things have changed.

We can tell the XAML that things have changed by implementing the INotifyPropertyChanged interface. This is a simple interface, it has one method: PropertyChanged.

We could write this code ourselves, or we could leverage what is already available (standing on the shoulders of giants). So let’s enter MVVM (Model View ViewModel).

There are several related architectural patterns MVP, MVC, MVVM. They all prescribe the way separation of concerns is implemented a rich user interface application.

So the main theme is separation of concerns. In the case of MVVM we have:


  • Model. This is all the code that does not care about the presentation. It contains all code that is unaware of users interacting with the system, so we could create several ways of presenting the model to the user: WPF, Windows Store App, internet website, etc., in all cases the model stays the same. So the model could contain:


    • all business logic

    • all persistence related logic

    In our example the model is managed by a mathematician. He is the domain expert and knows everything about primes.


  • View. This is the presentation layer. It describes the look and feel of the application. The aim is to create declarative code like XAML and reduce the code in the code behind as much as possible.
    In our example the view is managed by a UI designer. He has chosen  the red color and the font.


  • View Model. This is the bridge between the model and view. Imaging the model and view are already available. We know what it the App looks like and all business and persistence logic is created. All code required to make the application complete will be part of the View Model.

This is where we are right know in our example. To complete the application we have to create View Model code. We could write this code ourselves, or we could leverage what is already available.

There are several MVVM frame works available: MVVVM Frameworks.

Of course we go for the F# option: FSharpWpfMvvmTemplate by Dan Mohl. This template was not created with WinRT in mind, so we have to be careful.

Create a new base class in the F# project called “ViewModelBase.fs” and copy the code for the template project:
//https://github.com/dmohl/FSharpWpfMvvmTemplate
namespace FSharpWpfMvvmTemplate.ViewModel
open Systemopen System.Windowsopen System.Windows.Inputopen System.ComponentModel
type ViewModelBase() =
let propertyChangedEvent = new DelegateEvent<PropertyChangedEventHandler>()
interface INotifyPropertyChanged with
[<CLIEvent>]
member x.PropertyChanged = propertyChangedEvent.Publish
member x.OnPropertyChanged propertyName =
propertyChangedEvent.Trigger([| x;
new PropertyChangedEventArgs(propertyName) |])

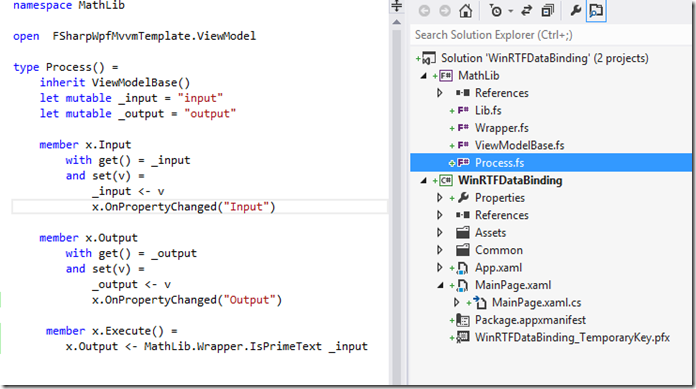
And change the code of the Process class:
namespace MathLib
open FSharpWpfMvvmTemplate.ViewModel
type Process() =
inherit ViewModelBase()
let mutable _input = "input"
let mutable _output = "output"

member x.Input
with get() = _input
and set(v) =
_input <- v
x.OnPropertyChanged(
"Input")

member x.Output
with get() = _output
and set(v) =
_output <- v
x.OnPropertyChanged(
"Output")

member x.Execute() =
x.Output <- MathLib.Wrapper.IsPrimeText _input

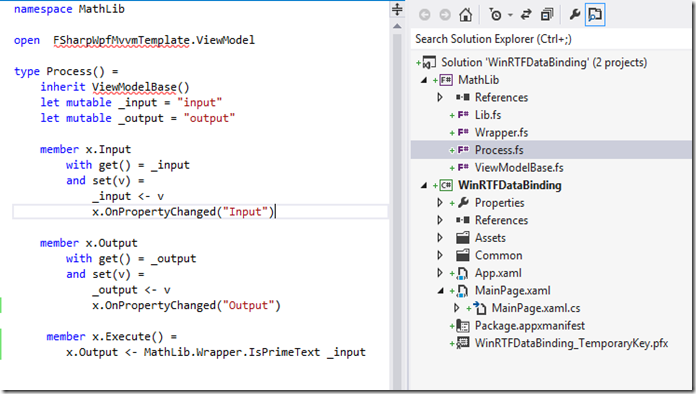
we derive the Process class from the ViewModelBase class and raise the OnPropertyChanged event when the value of one of the properties is changed.

ProcessUp

We have to move the Process file to it’s correct place in the project to let it compile:

ProcessDown

The result:

screenshot_01272013_115544

So it works. We have now two issues to solve:


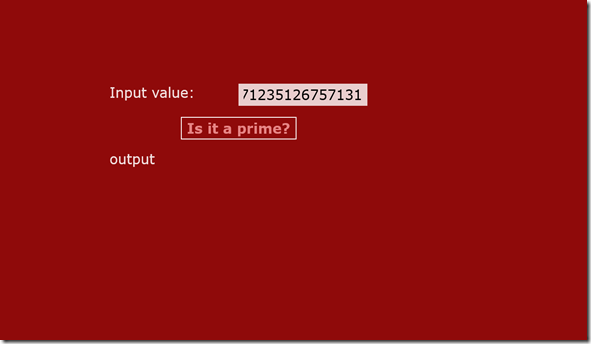
  1. The code we created can not deal with log running calculations. Just enter 756771235126757131 and the UI freezes.

  2. We still have an event handler, the button click. Is there a better way to deal with this so we can write the what happen after we click the button with F# code?

We solve the second issue first. Again MVVM comes to the rescue. We can bind a Command to the button. A Command is a class that implements the ICommand interface. We copy again from FSharpWpfMvvmTemplate. Create a new F# file and call it RelayCommand and copy the code:
//https://github.com/dmohl/FSharpWpfMvvmTemplatenamespace FSharpWpfMvvmTemplate.ViewModel
open Systemopen System.Windowsopen System.Windows.Inputopen System.ComponentModel
type RelayCommand (canExecute:(obj -> bool), action:(obj -> unit)) =
let event = new DelegateEvent<EventHandler>()
interface ICommand with
[<CLIEvent>]
member x.CanExecuteChanged = event.Publish
member x.CanExecute arg = canExecute(arg)
member x.Execute arg = action(arg)

Replace the Execute method Process file by the ExecuteCommand:
     member x.ExcecuteCommand = 
new RelayCommand ((fun canExecute -> true),
(
fun action ->
x.Output <- x.Input |> Wrapper.IsPrimeText ))

Remove the event handler in the code behind and change the XAML of the button into:
<Button Grid.Row="2" Grid.Column="1" Grid.ColumnSpan="3" 
Content="Is it a prime?"
x:Name="calculate"
HorizontalAlignment="Center" VerticalAlignment="Center"
Foreground="#FFE68484" FontFamily="Verdana" FontSize="32"
Command="{Binding ExcecuteCommand}"/>

We deleted the Click handler and add the binding of the Command.

F5 and the app works the way it worked, this time without the C# event handler and with F# Command.

To solve the first issue, dealing with long running calculations we change the code of the Command:
     member x.ExcecuteCommand = 
new RelayCommand ((fun canExecute -> true),
(
fun action ->
let
task = x.Input |> Wrapper.IsPrimeTask
x.Output <- task.Result))

in this case task wrapper to perform the code asynchronous.

So everything works fine again.

screenshot_01282013_091535

Let’s end with two remarks, the first is related with MVVM, the second with F# async.

From our solution it is not clear how we dealt with separation of concerns.

In our case we have a very small model, it contains just the IsPrime function. The View is the C# project and so the remaining F# code has to be the View Model: the wrappers, the Process class, the ViewModelBase and the RelayCommand are all part of the glue we needed to make the IsPrime function available for the user interface. In a real world project we have to make the structure explicate.

In stead of using a Task we could use the F# async workflow. So let’s replace the ExecuteCommand by
     member x.ExcecuteCommand = 
new RelayCommand ((fun canExecute -> true),
(
fun action ->
let
execute =
async {
x.Output <-Wrapper.IsPrimeText(x.Input)
}
execute |> Async.Start
))

F5 and enter a value un the TextBox. We get an exception:

Exeption

The Dutch inner exception message tell us that we used the wrong thread to update the UI.

We can fix this changing the ViewModelBase. We capture the context at initialization and Post at the context.
type ViewModelBase() =
//capture the context of the UI
let context = System.Threading.SynchronizationContext.Current
let propertyChangedEvent = new DelegateEvent<PropertyChangedEventHandler>()
interface INotifyPropertyChanged with
[<CLIEvent>]
member x.PropertyChanged = propertyChangedEvent.Publish
member x.OnPropertyChanged propertyName =
//Post at the right thread
context.Post(( fun _ -> propertyChangedEvent.Trigger([| x; new PropertyChangedEventArgs(propertyName) |])), null)

After the fix everything works fine again.

The next post we discuss dealing with collections from a XAML F# perspective.

Total Pageviews